Removal
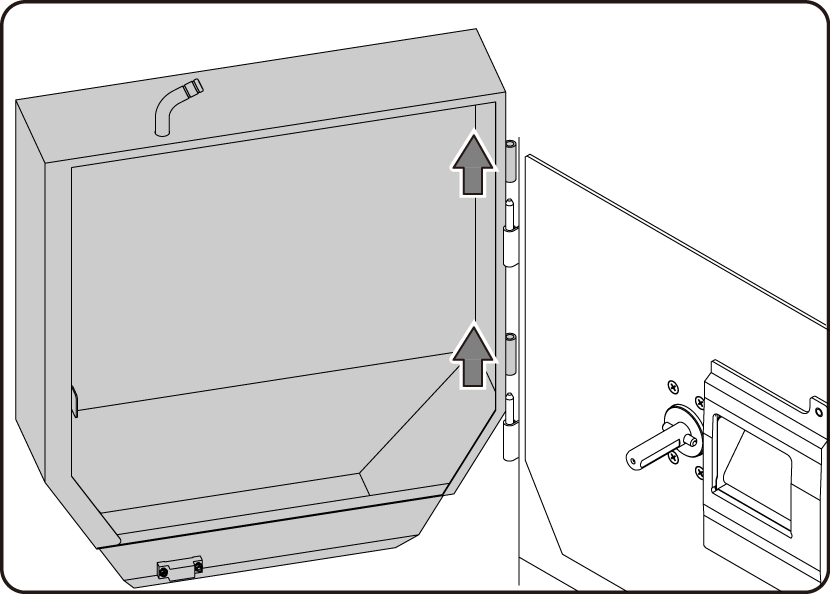
Cutter cover
1 | Raise the cutter cover straight upwards.Pull and remove the cutter cover from the hinge of the main unit. |
|
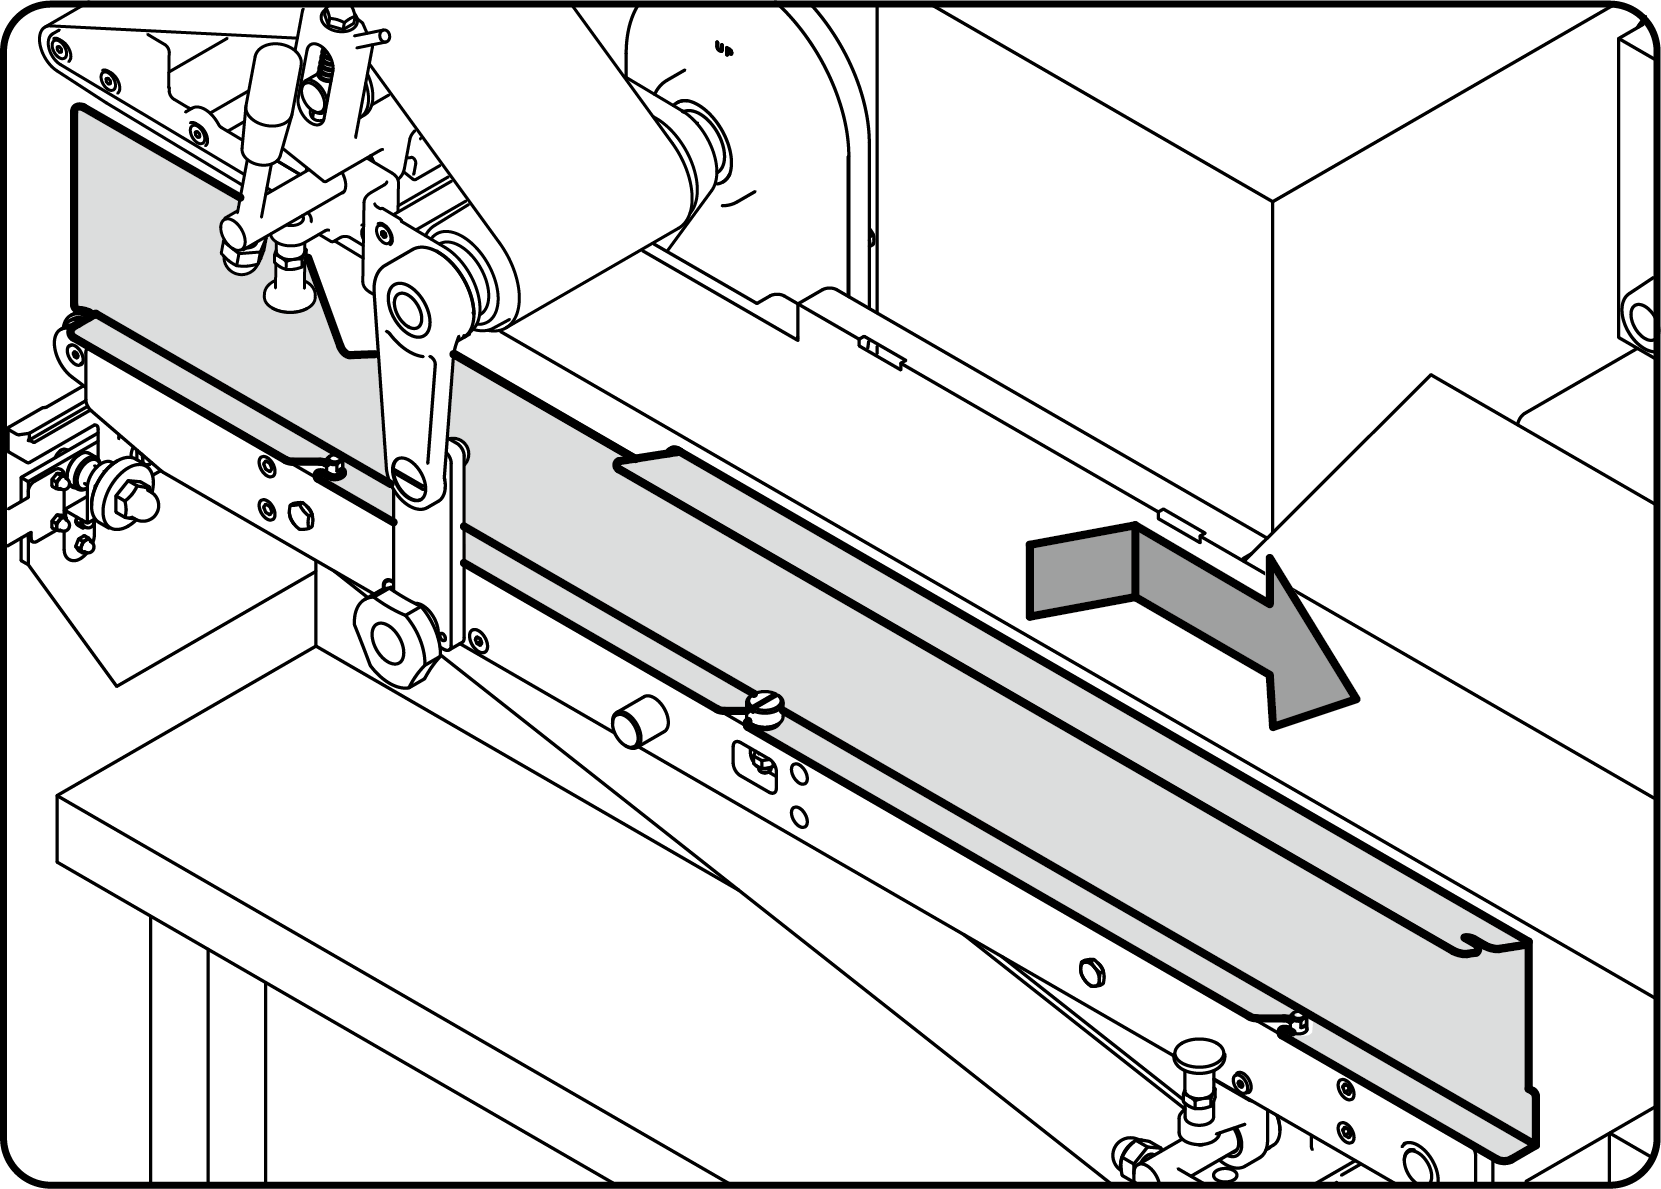
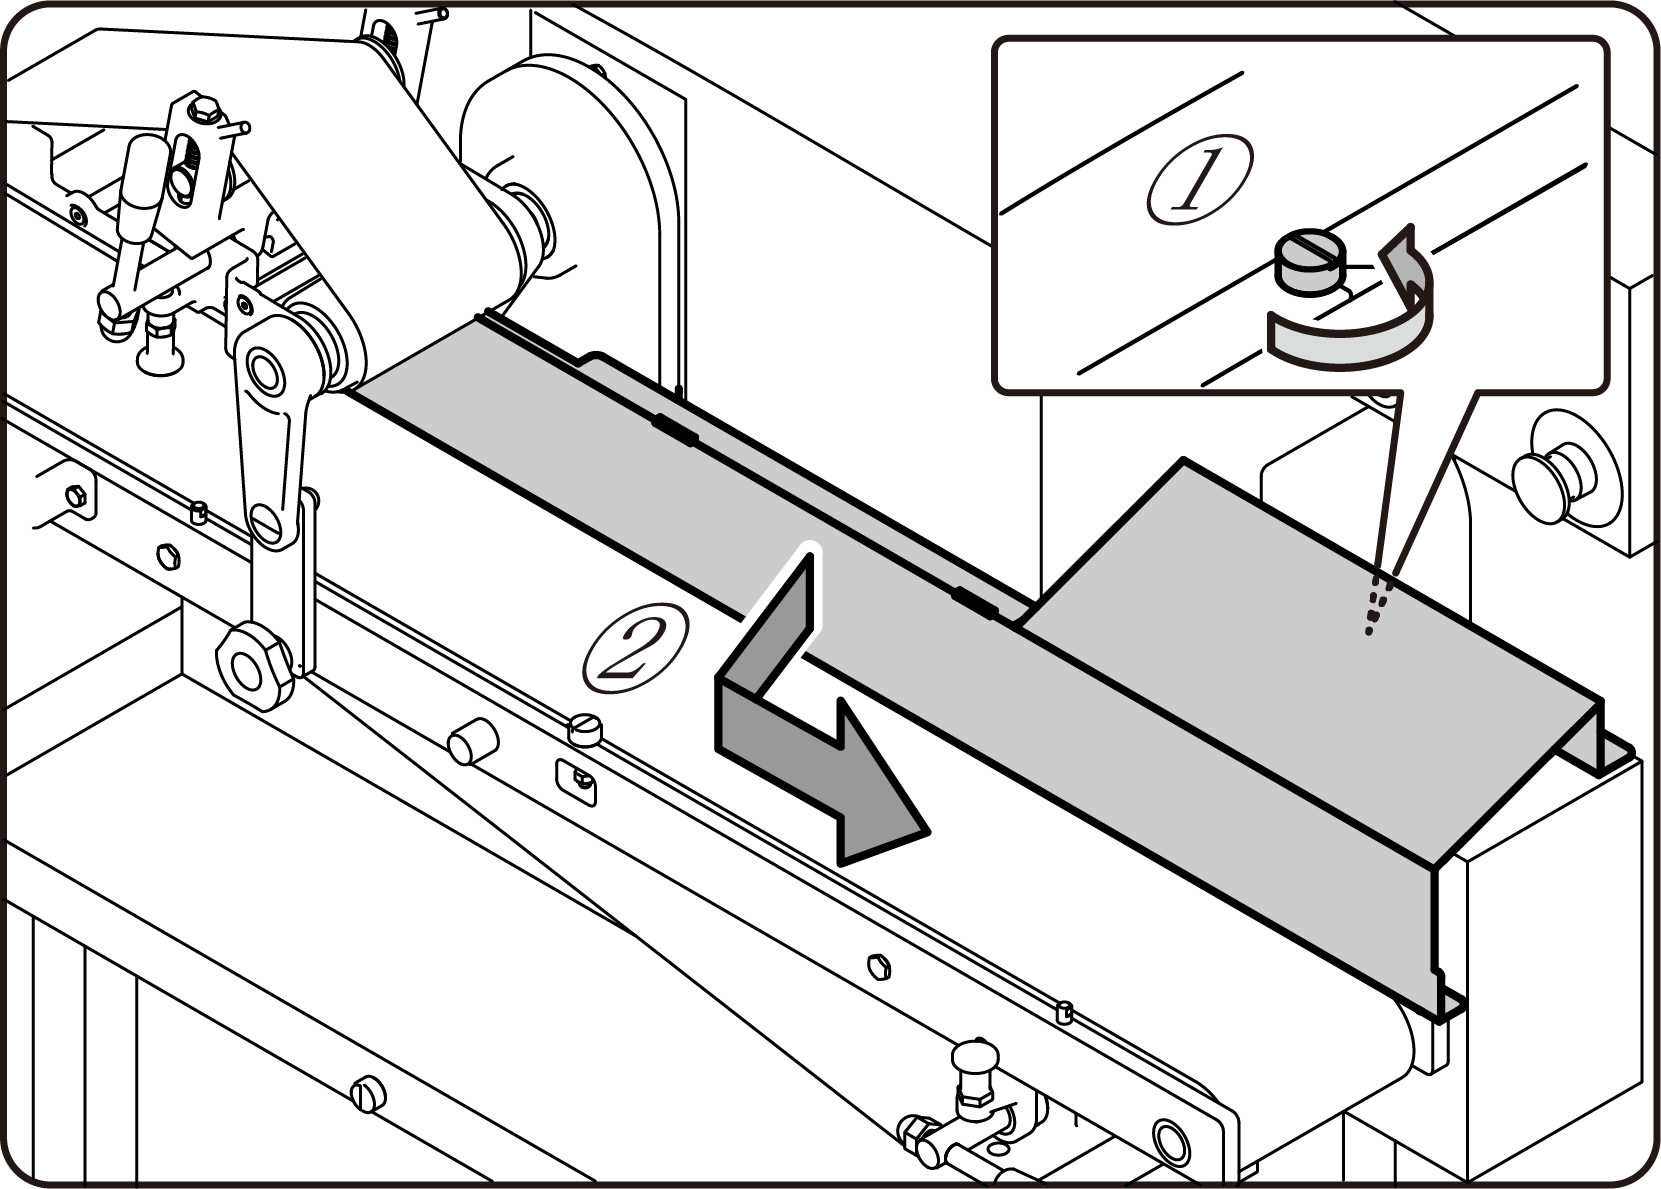
Conveyor cover (lower)
1 | Raise the lower part of the conveyor cover and take it off. |
|
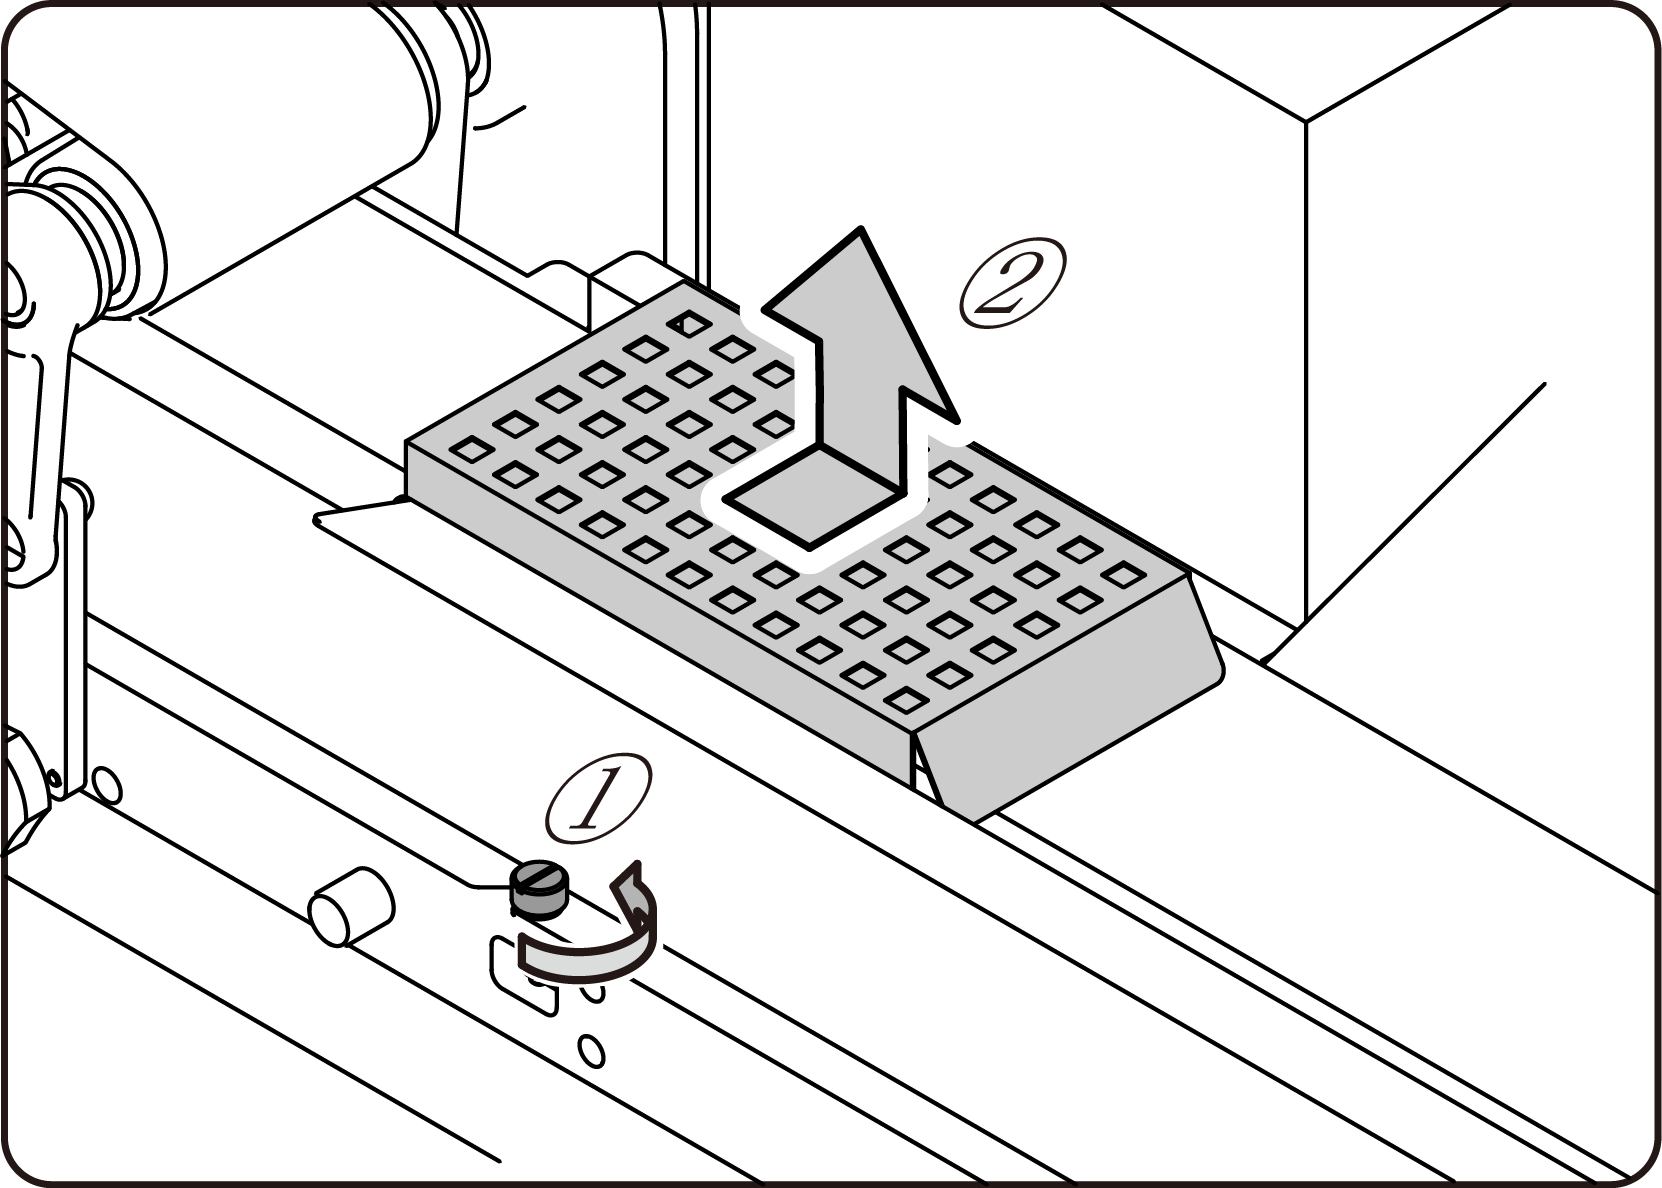
Partition board
1 | Loosen the knobbed screws to move the guide plate L slightly forward and remove the partition board. |
|
Guide plate L
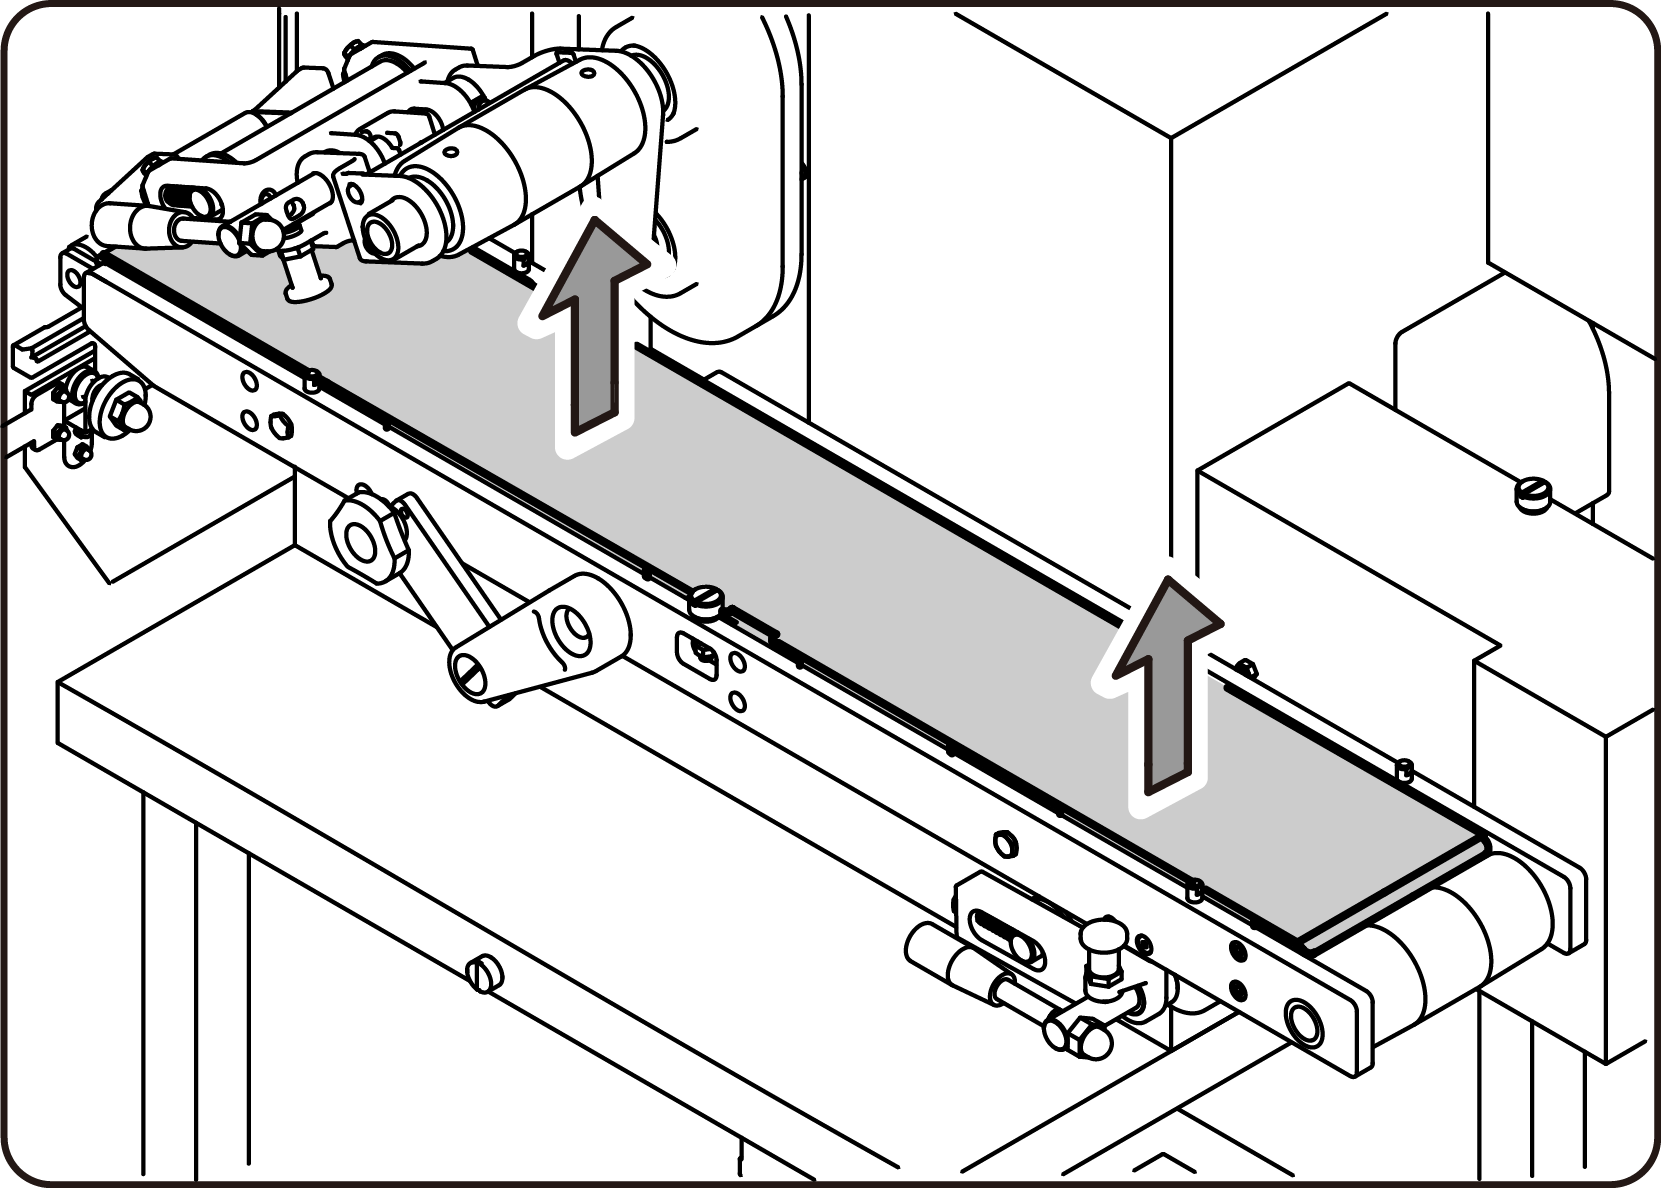
1 | While lifting the hold-down conveyor, slide the guide plate L to the right and remove it. |
|
Guide plate R
1 | While raising the hold-down conveyor, loosen the knobbed screws and slide the guide plate R to the right and remove it. |
|
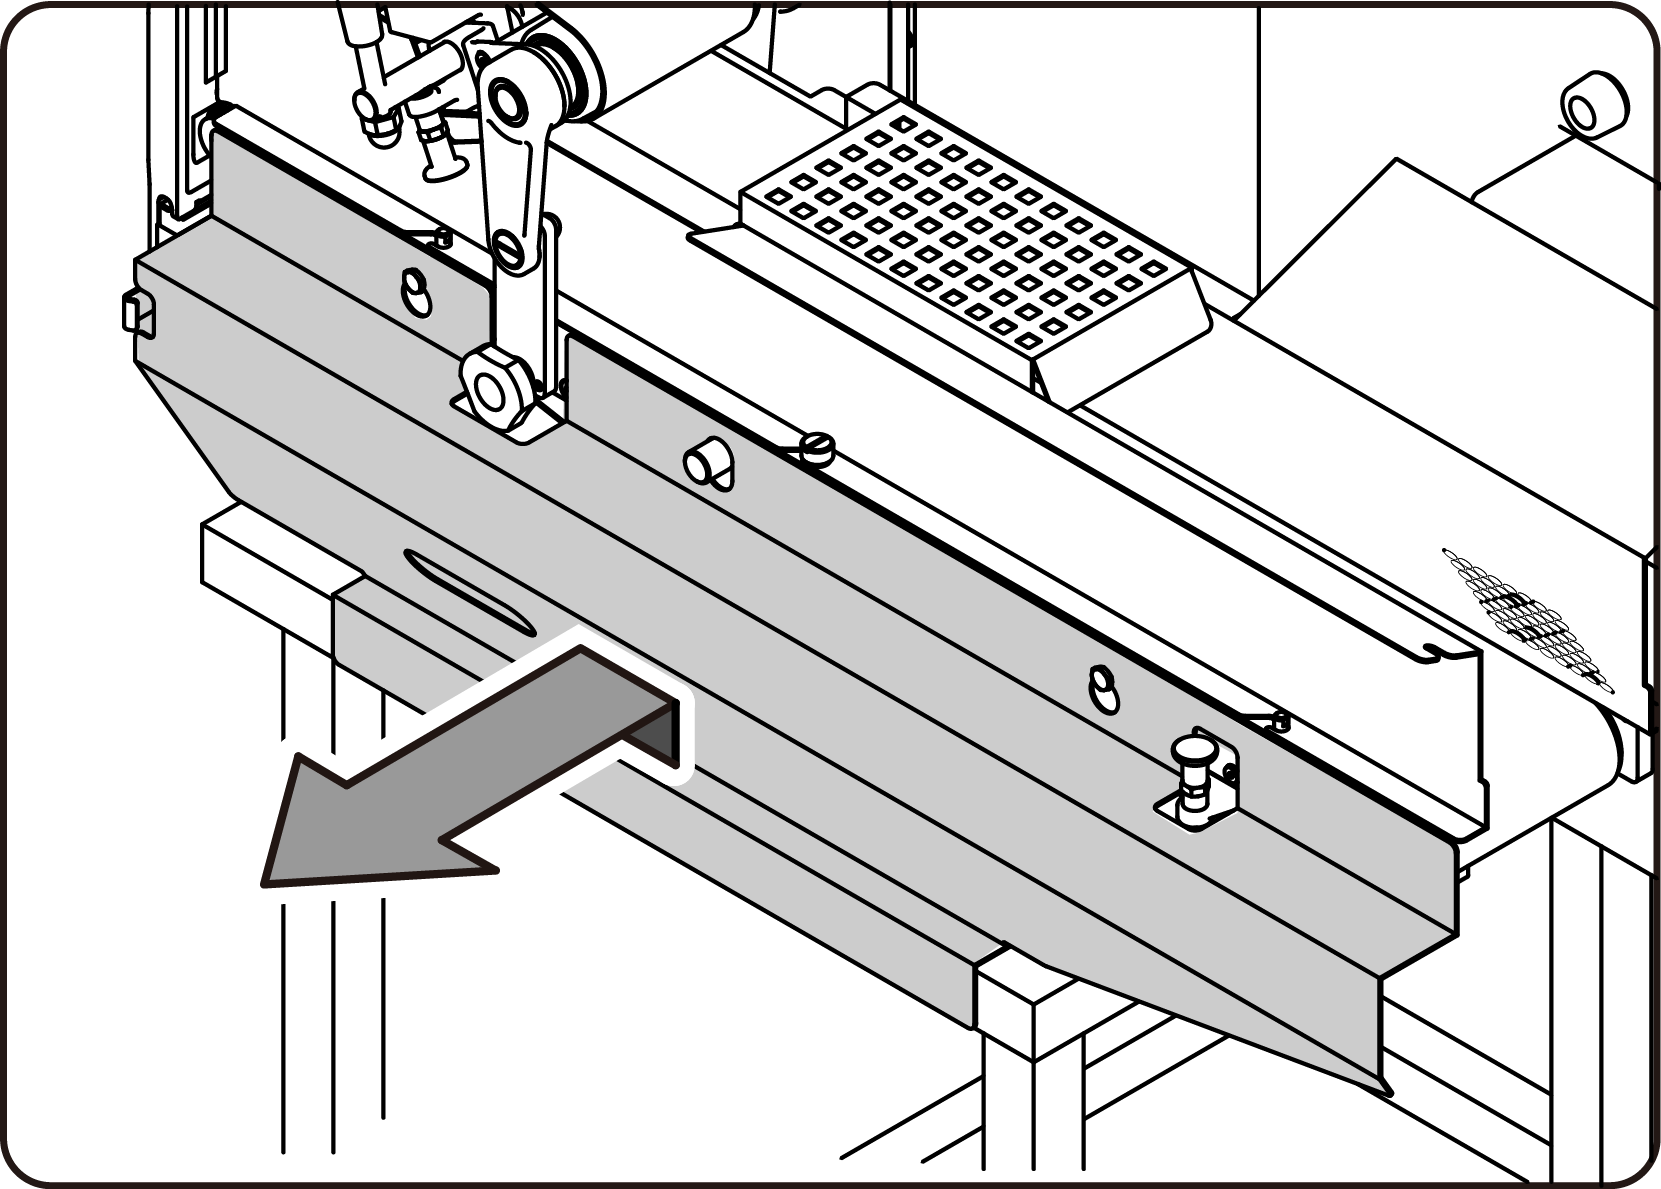
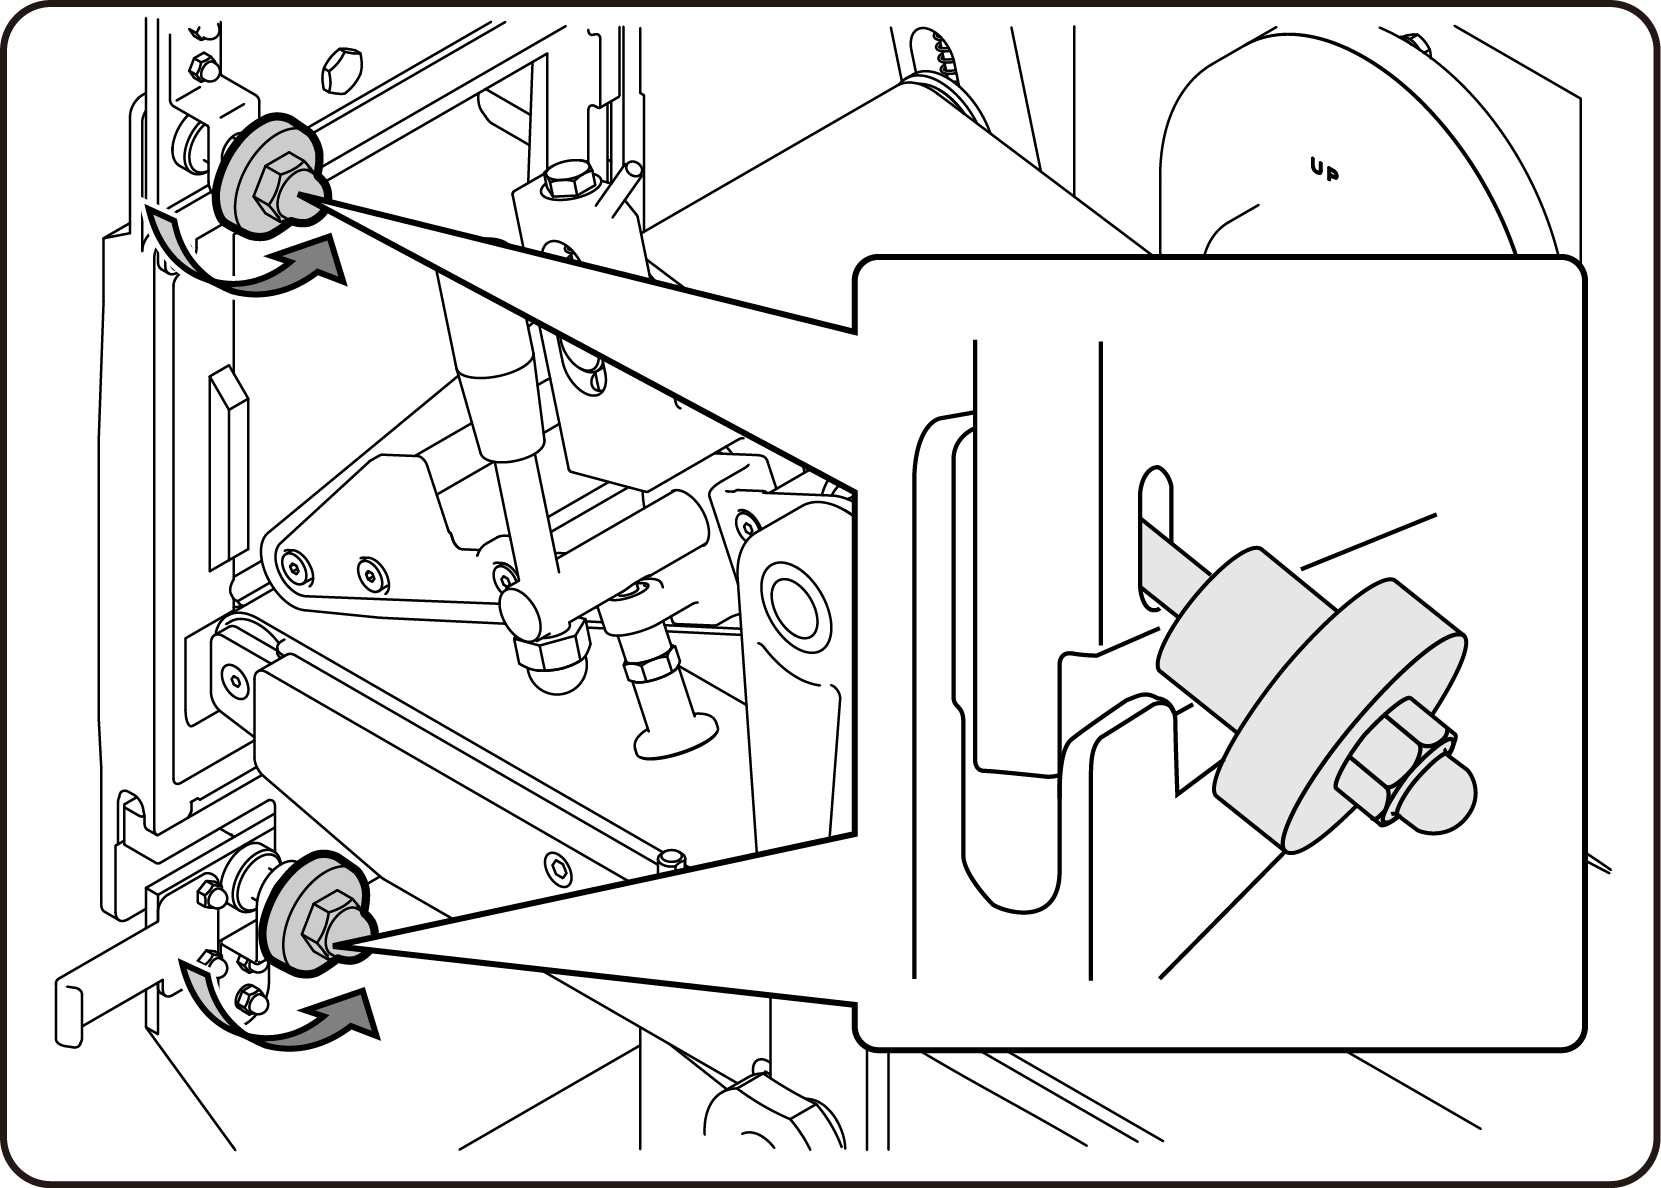
Mouthpiece
1 | Loosen the 2 fixing nuts of the mouthpiece. |
|
2 | Slide the mouthpiece to remove it. |

Upper belt
1 | Tilt down the hold-down take handle and loosen the upper belt.Tilt down the hold-down take handle to the left while pulling the index plunger.
If the index plunger is too tight, pull it out while pulling the hold-down take handle to the right, and then tilt down the hold-down take handle to the left. |
| ||||||
2 | Move the hold-down bracket.
| |||||||
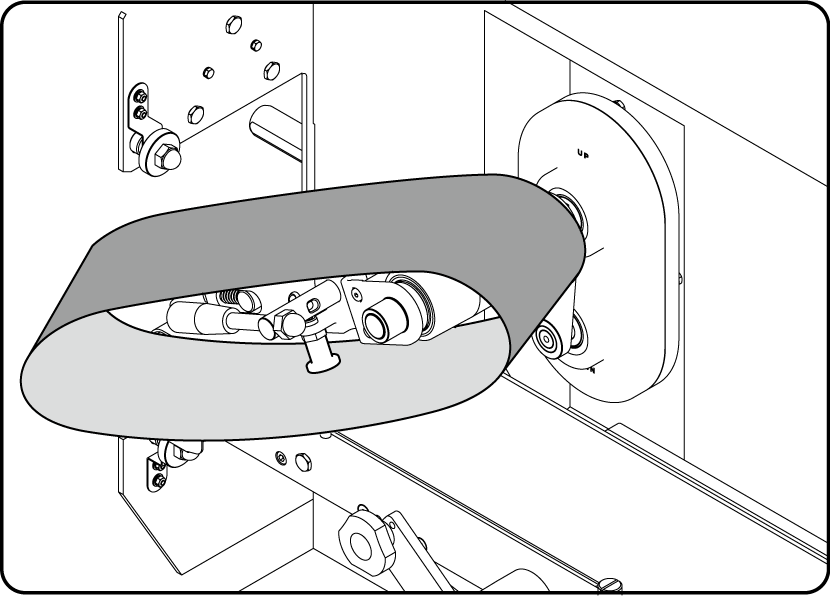
3 | Remove the upper belt.While lifting the hold-down conveyor, remove the upper belt from the left side. |

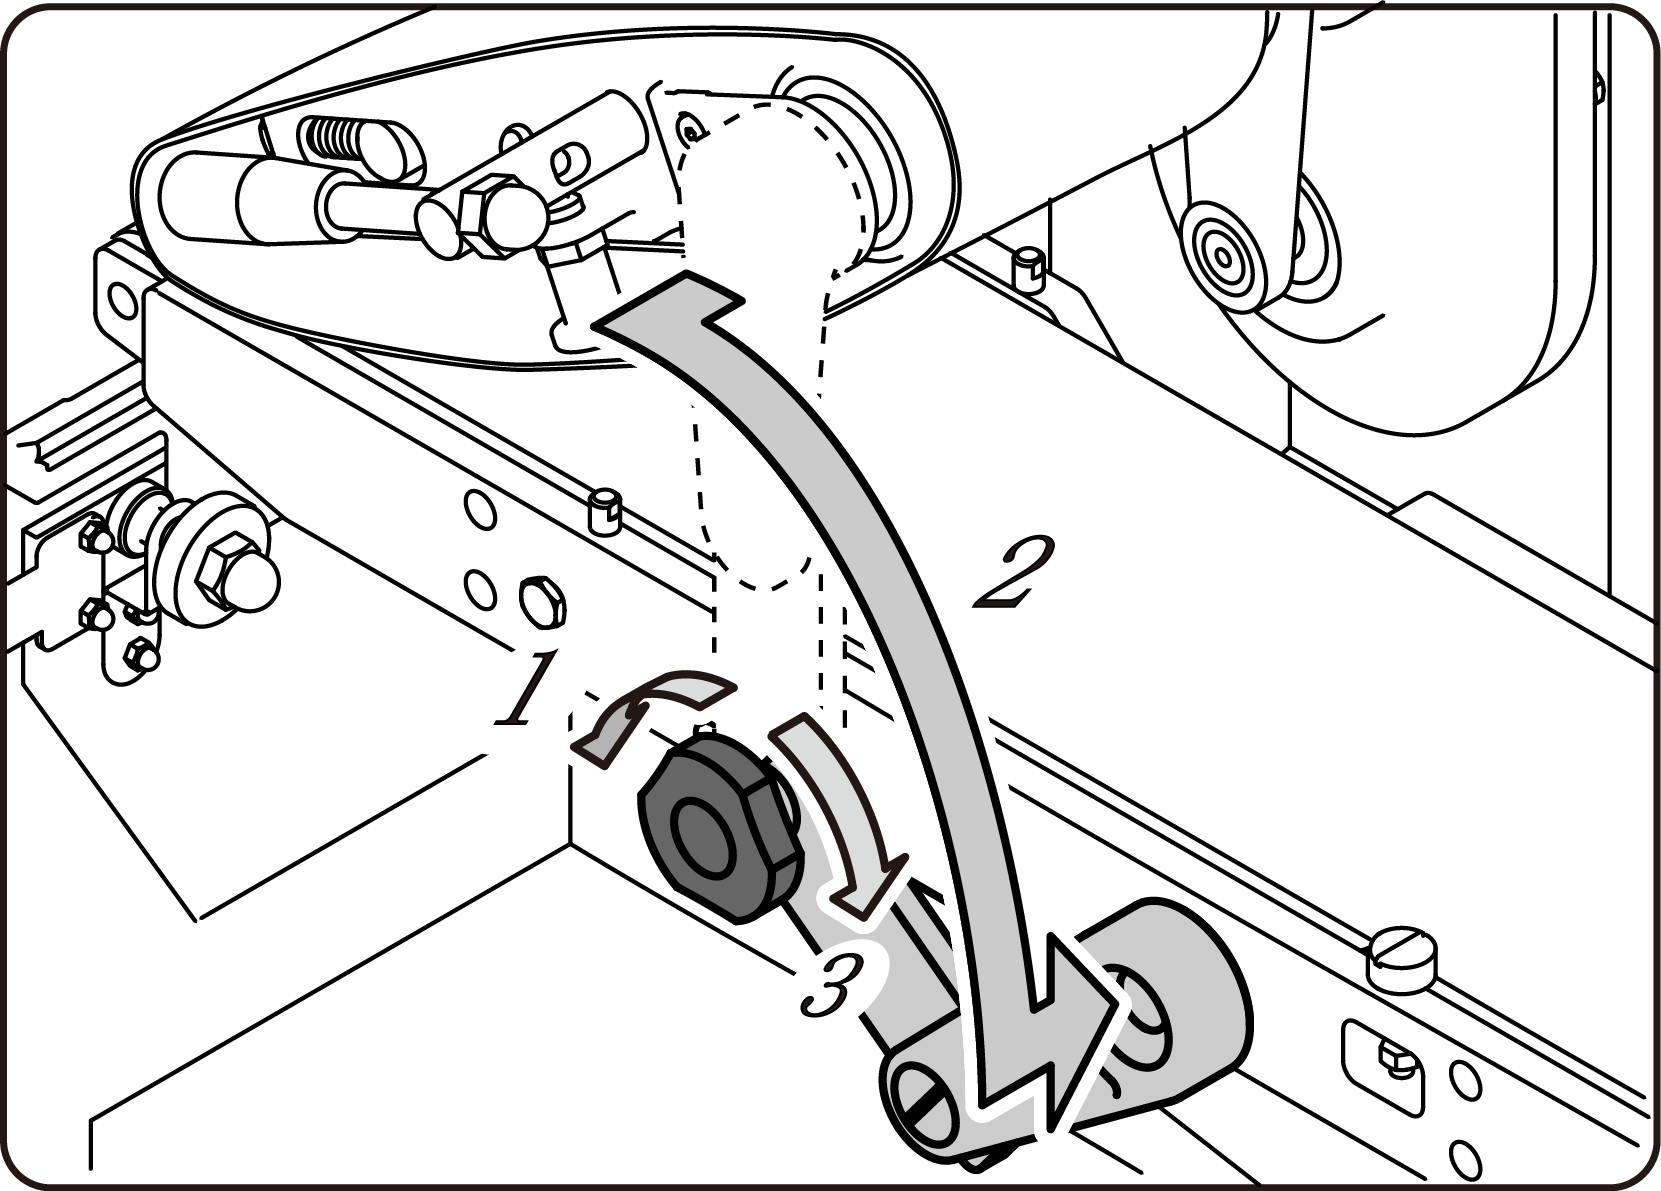
Lower belt
1 | Turn the feed take handle and loosen the lower belt.While pulling the index plunger, turn the feed take handle clockwise one cycle until a click sound is heard.
If the index plunger is too tight, pull it out while holding down the feed take handle, which can then be turned clockwise. |
| |
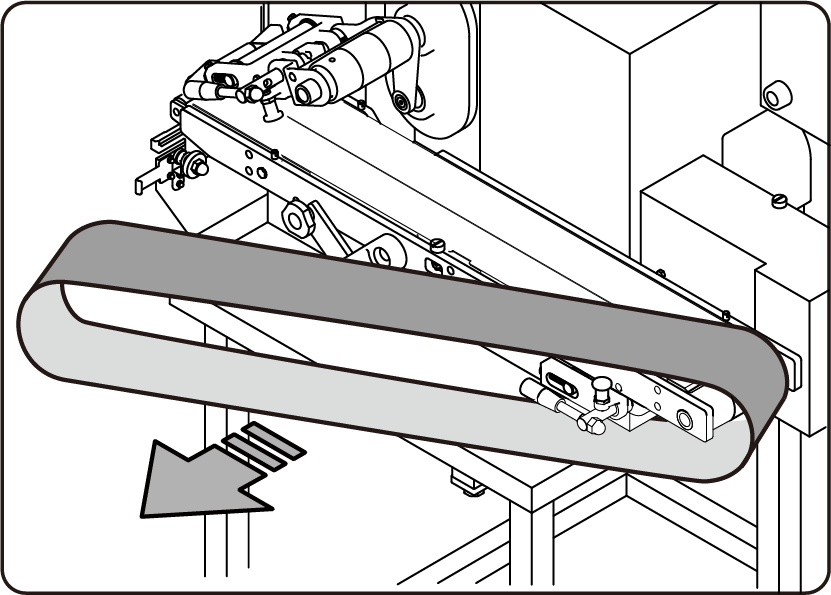
2 | Remove the lower belt.While raising the hold-down conveyor, remove the lower belt from the left side. |

Conveyor bottom plate
1 | Remove the conveyor bottom plate. |
|